How to properly transcribe an interview: a reviewable workflow
Transcribe an interview step by step: consent and recording tips, a fast machine draft, speaker labels, verbatim style, timestamps, a review ledger and a final audio check.
Try audio transcription free, in your browser →
To properly transcribe an interview: keep the original recording untouched, decide on a transcription style (full or clean verbatim), make a first draft — by typing or with speech-to-text — then listen to the whole recording again while correcting the draft, labelling every speaker turn and resolving names and numbers. Anything you cannot resolve stays in the transcript as a timestamped [unclear] marker rather than a guess. A transcript is a record of what was said; keep your interpretation, summary and coding in a separate document.
Choose how you will make the first draft
There are three ways to get from audio to a first draft. Most people now combine the second with a careful review.
| Type it yourself | Speech-to-text, then review | Human transcription service | |
|---|---|---|---|
| Your time | The longest: you type every word | Mostly review: listening and correcting | Least, but you still check names and terms |
| Cost | Free | Free to low | Paid per audio minute |
| Privacy | The audio stays with you | Depends on the tool: in-browser tools keep it on your device; cloud tools upload it | The audio goes to the service and its transcribers |
| Typical weak spots | Fatigue, skipped words | Names, jargon, overlapping speech, quiet replies | Unfamiliar names and terms |
| Good for | Short interviews, sensitive material, learning the content deeply | Most interviews | Large volumes with a budget, or poor audio |
A machine draft is not the end product, but it changes where your time goes: instead of typing, you spend it on the parts that need judgment.
1. Set the rules before you start
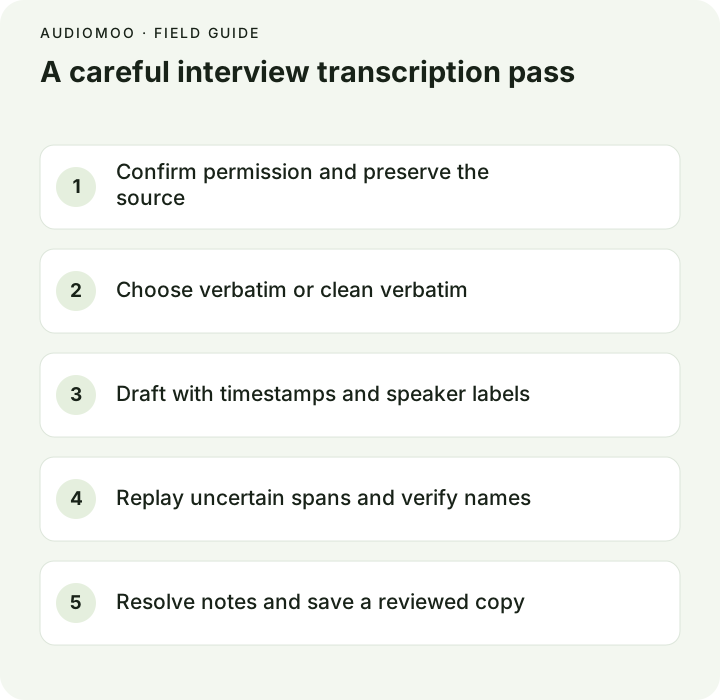
- Permission. Confirm the interviewee agreed to be recorded and transcribed, and who may see the transcript. For research, follow your ethics approval and consent form.
- Keep the source. Store the original file safely and work on a copy. Note its filename, date, length and language.
- Pick a style. Full verbatim keeps fillers, false starts and repetitions; clean verbatim removes them but keeps every meaningful word; an edited transcript also tidies grammar. Research interviews usually use clean verbatim unless hesitation matters to the analysis. The verbatim guide shows the same answer in each style.
- Decide on timestamps. One at every speaker turn is the most useful default for interviews. See the timestamp format reference.
2. Record so the transcript is easy
Most transcription problems start at the recording:
- Use an external or lapel microphone if you can; otherwise place the phone between you, close to the interviewee, on a soft surface.
- Choose a quiet room without echo. Soft furnishings help more than you would expect.
- For a remote interview, record each side on its own track if your tool allows it.
- Ask the interviewee to spell names, organizations and places at the end, on the recording.
- Avoid talking over answers. Short “mm-hm”s from the interviewer are the hardest thing to place in a transcript.
3. Make the first draft
Open audio to text — or voice memo to text for an iPhone recording, M4A to text for most phone recorders — and choose the file. Select the interview’s language if you know it. The transcription runs inside your browser, so the recording is not uploaded anywhere, which is usually what consent forms and ethics boards want to hear. The video above shows the whole run on a real file, from choosing it to downloading the result.
How long it takes depends on your computer. As a reference point, in our own test on a 4-core cloud machine with no graphics card, a 3-minute recording took 44 seconds on the first run, including the one-time model download, and the first words appeared after about 10 seconds. Longer files scale roughly in proportion.
The draft comes back as paragraphs with a timestamp at the start of each one. AudioMoo does not identify speakers, so the next step is yours.
4. Label speakers and format the turns
Write a speaker key at the top — INTERVIEWER, PARTICIPANT, or pseudonyms if the transcript will be shared — then listen from the beginning and put a label in front of every turn, splitting paragraphs where the speaker changes. Never infer who is speaking from what they say alone; listen. The interview transcript example shows a finished layout, and the transcript template gives you a header to copy.
5. Review against the audio
This is the step that makes a transcript proper. Listen in short sections and read along:
- First pass: follow the whole exchange for meaning, correcting obvious errors.
- Second pass on the hard parts: replay unclear spans at normal speed, then slower. Most players let you slow down to 0.75× without distorting voices much.
- Check every proper name, organization, date, number and negation against the recording and, for spelling, against a source you trust — the interviewee’s own spelling at the end of the recording is the best one.
- Mark what you cannot resolve as
[unclear 12:08]and move on. A visible gap is more useful than a confident guess.
Use context to generate possible words, never to silently replace what the audio supports. Speech recognition models are trained to produce fluent text, so their mistakes often look plausible — a grammatical sentence is not evidence of a correct one.
6. Keep a review ledger
A ledger records what you checked and decided, so another person can verify the transcript without redoing it. The entries below are fictional:
| Time | Draft says | Review action | Status |
|---|---|---|---|
| 02:14 | “Harbor Street” / “Harper Street” | Replayed; checked participant’s spelling at 41:30 | Resolved: Harbor Street |
| 08:37 | Two voices overlap | Replayed at 0.75×; both phrases distinguishable | Marked [overlap] |
| 16:02 | Sentence trails off | Kept the cutoff; did not complete the thought | Resolved |
| 23:50 | “fifteen” or “fifty” | Replayed three times; still ambiguous | [unclear 23:50 — fifteen/fifty] |
7. Final check and handover
Replay the complete recording one last time while reading. Check speaker changes, short replies that may have been dropped, every ledger item, and that nothing was “cleaned” that changes meaning. Then:
- Remove or replace identifying details if the project requires it, and keep any pseudonym key in a separate, secured file.
- Name the file without personal data, for example
INT-07_2026-11-02_reviewed.docx. - Mark the version as reviewed, and keep the original audio and the draft as your project rules require.
For qualitative research, read each transcript in full before coding it: context and sequence change how a response is understood, as the CDC’s guidance on qualitative data also stresses. For a focused error-catching pass, use the proofreading checklist.
Plan your review time
Use the planner below to reserve time. Enter the length of the recording and your own estimate of working minutes per audio minute; review of a clean machine draft takes far less than typing from scratch, while poor audio, several speakers, specialist vocabulary and translation all take more. It is arithmetic for planning, not a promise.
Questions
How long does it take to transcribe a one-hour interview? Typing it from scratch takes several hours for most people, because speech is far faster than typing. Starting from a machine draft, the machine part takes minutes and your time goes into review, which depends mostly on audio quality, the number of speakers and how much specialist vocabulary there is. Time your first interview and use that pace to plan the rest.
Should I include “um” and “uh”? Only in full verbatim. Clean verbatim leaves them out but keeps every meaningful word, including hedges like “I think”.
Can I transcribe an interview for free? Yes. Typing is free, and AudioMoo’s browser tools are free with no account and no minute limit; they do not upload the recording.
How do I transcribe an interview in another language? Choose that language in the tool rather than relying on auto-detection, and keep the original-language transcript as the source. If you also need a translation, make it a separate, clearly labelled document.
Do I need to transcribe the interviewer’s questions? Yes, in almost all cases. Answers often only make sense next to the question, and leaving questions out makes it impossible to check whether a question led the answer.
Plan your transcription time
An arithmetic planning estimate using your chosen ratio. It does not predict processing speed or human performance.
Recording minutes × work ratio = work minutes.